
NCR Atleos's Customer Portal gives you immediate access to account information and the ability to transact digitally with NCR Atleos.
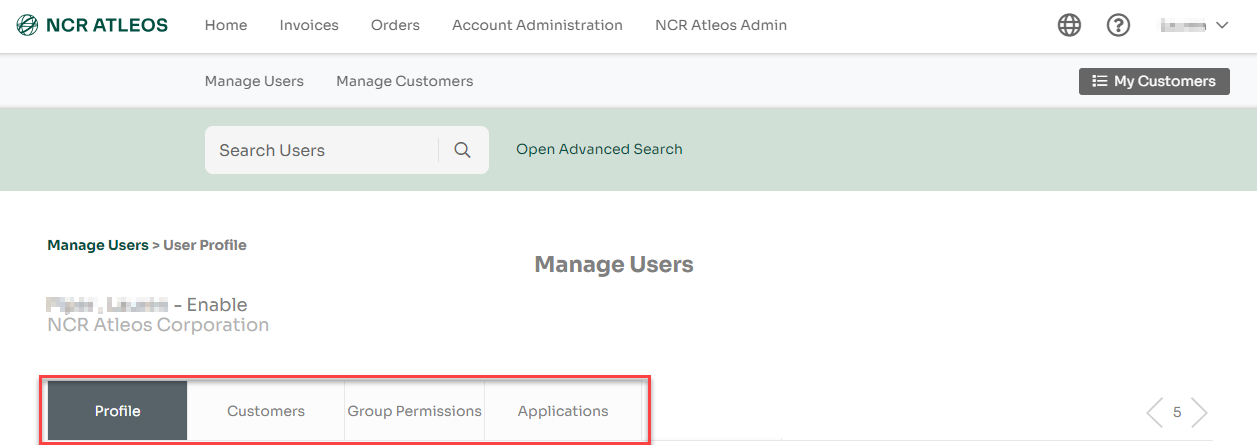
Access your profile page by clicking on your name in the top right of the page.

Within your profile page, you will see the following tabs:
Profile, Customers, Group Permissions, and Applications.
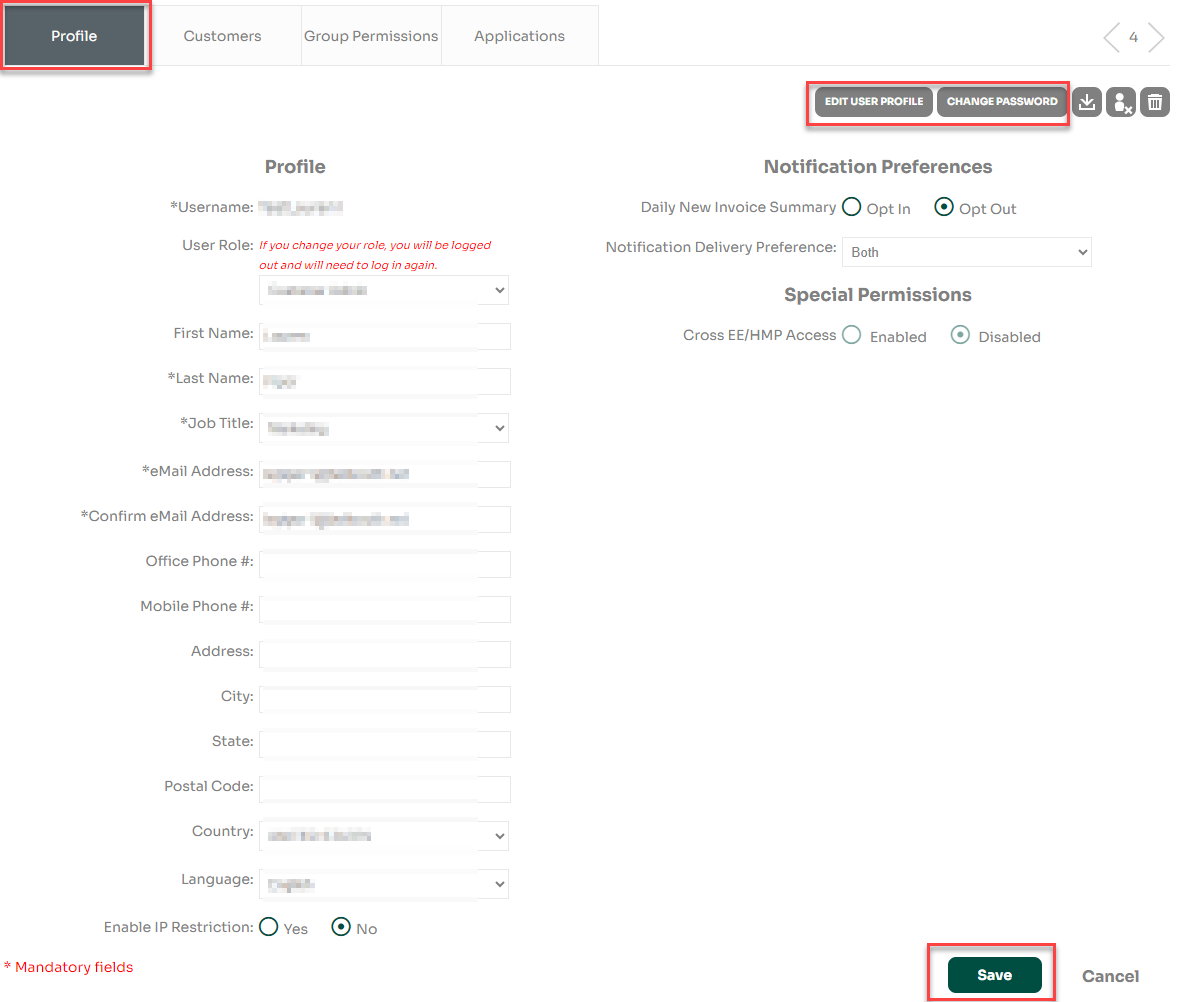
Edit your profile details by clicking Edit User Profile, making changes, and clicking Save. You can also change your password anytime via Change Password.
Shows a list of NCR Atleos Master Customer Numbers (MCNs) you are linked to and can access.

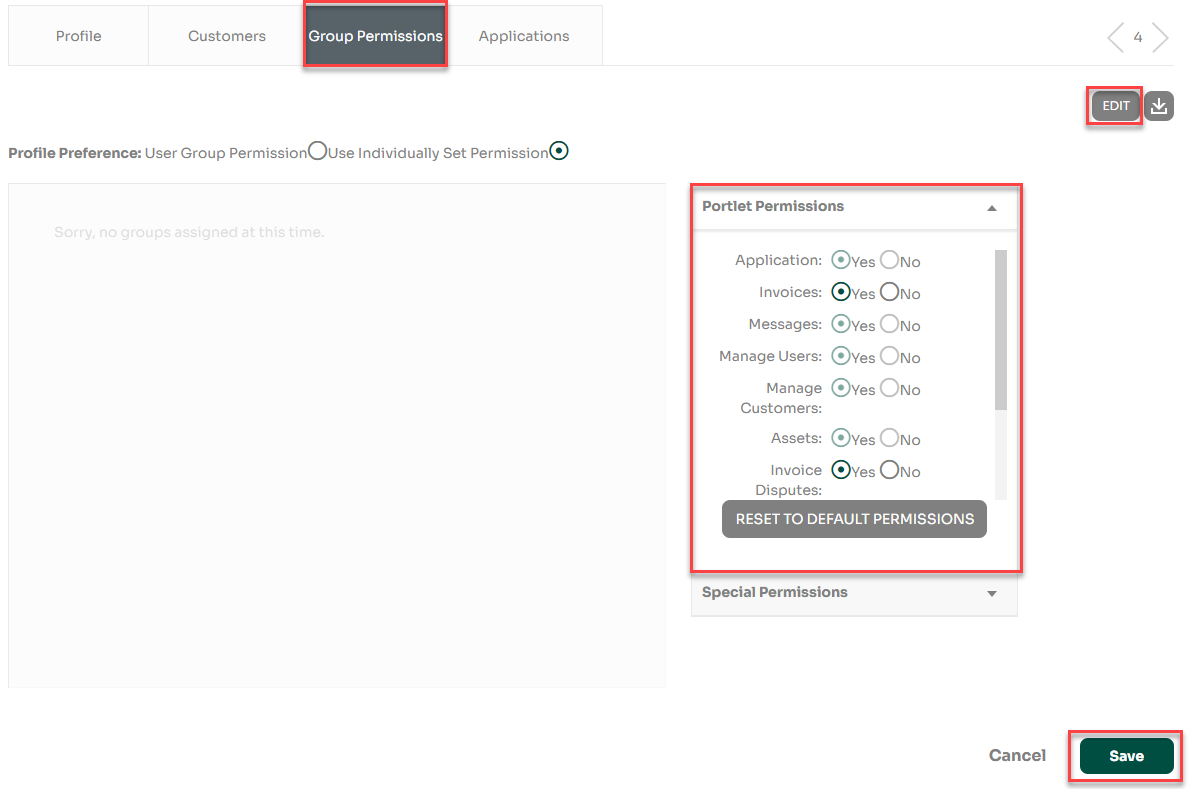
Allows you to enable or disable access to certain portal features. Click Edit, adjust the radio buttons, then click Save.
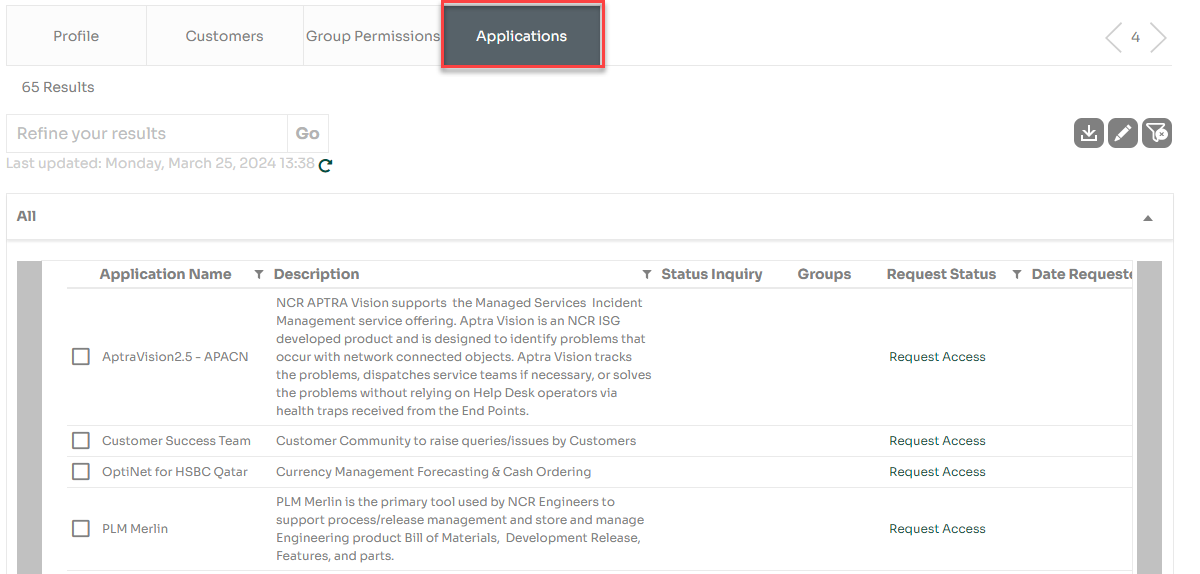
Displays available applications and those that can be added or requested. Applications labeled Request Access require NCR Atleos approval, while Add App items can be accessed immediately once added.
The Customer Administrator manages user creation, permissions, and account enabling/disabling.
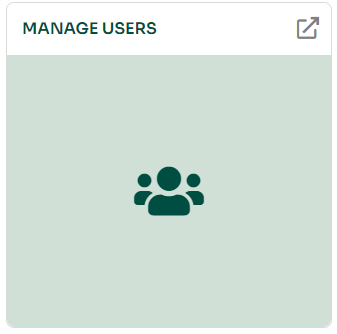
From the homepage, go to Manage Users by clicking the Expand button or anywhere inside the mint portlet.
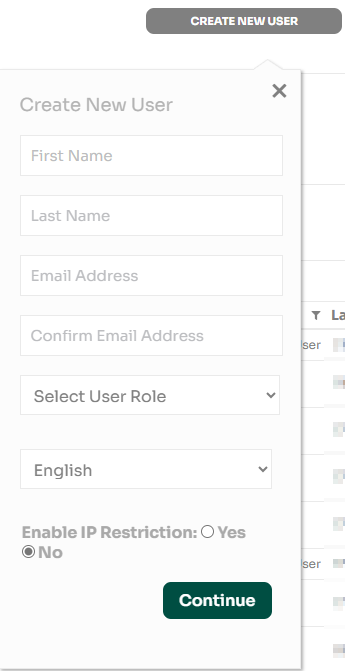
Click the Create New User button.

Fill out the form for the new user. Ensure the email isn’t already used. Click Continue.
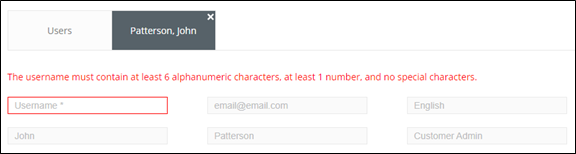
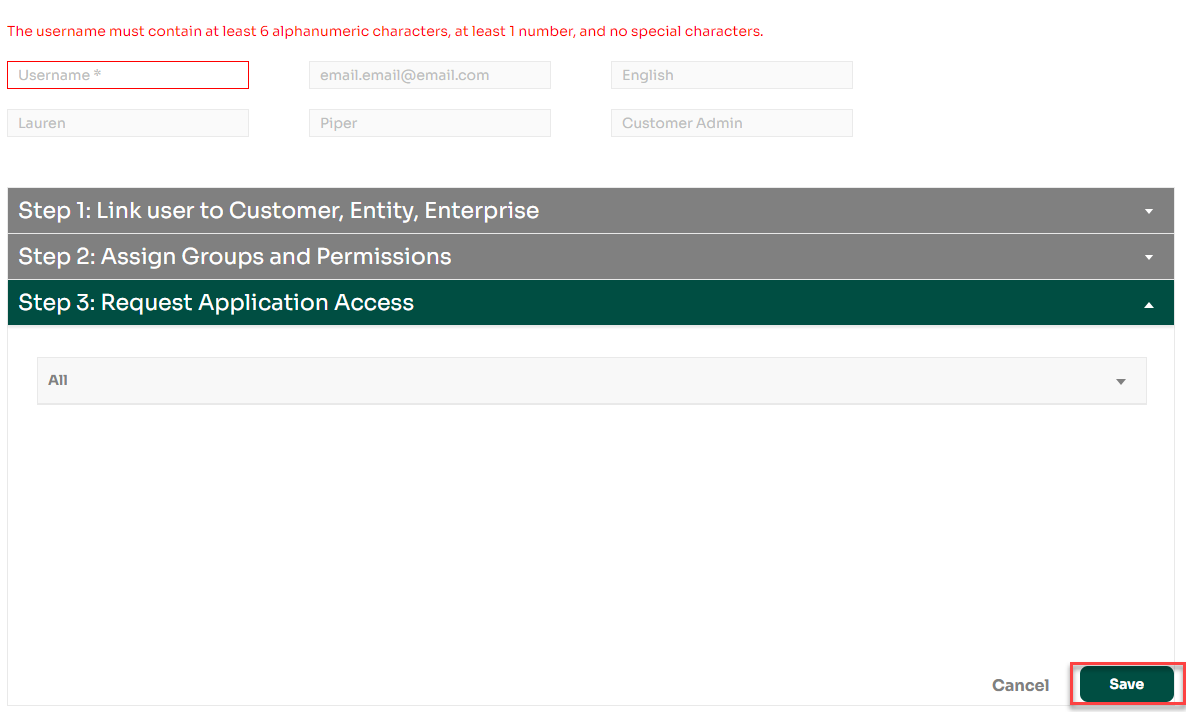
Assign a username (6+ alphanumeric characters, 1+ number, no special symbols).
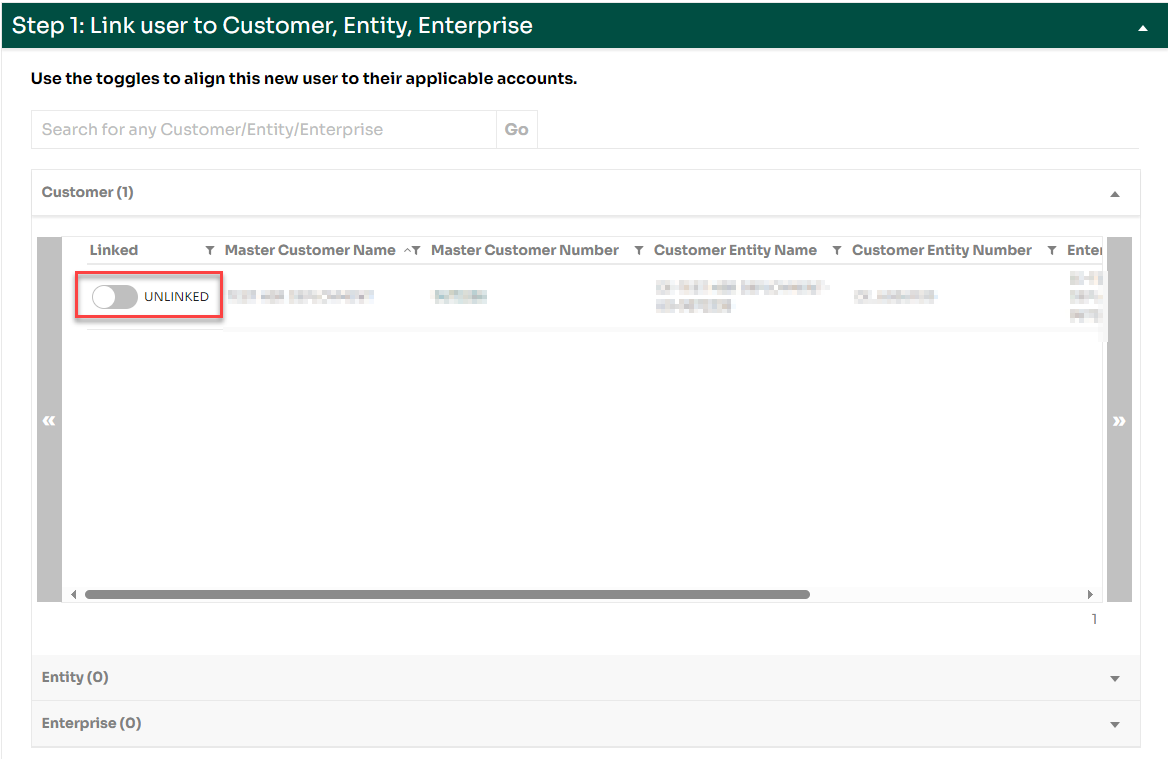
Next, link the user to their required NCR Atleos accounts — Customer, Entity, or Enterprise level.
| Customer | Relates to specific NCR Atleos Master Customer Numbers (MCNs). |
| Entity | Groups multiple MCNs together. |
| Enterprise | Includes all MCNs and Entities for the organization. |
Toggle UNLINKED to LINKED to connect users at the desired level.
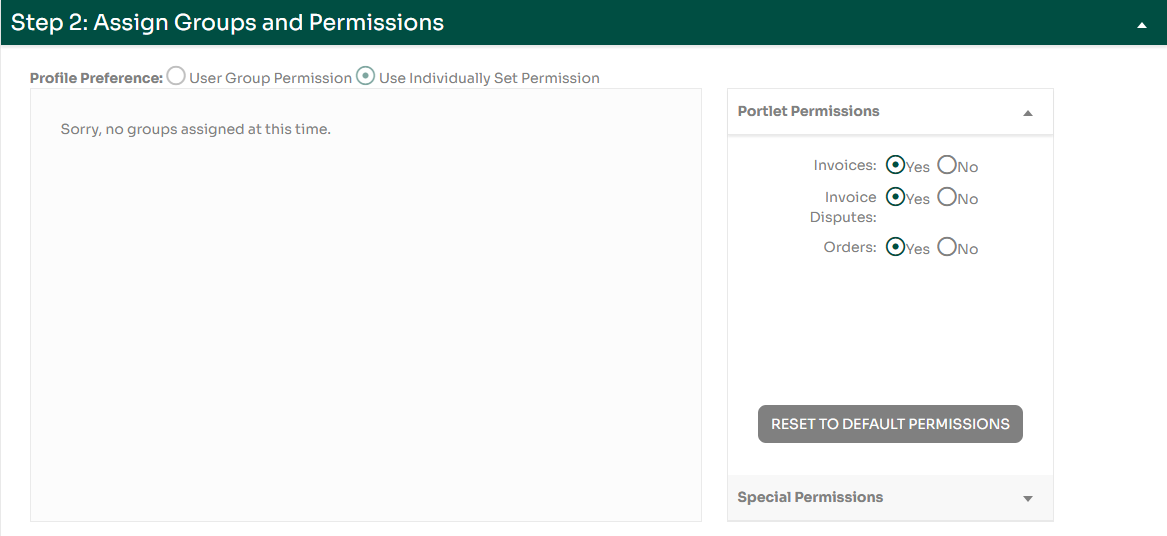
Grant permissions under Assign Groups and Permissions (Invoices, Invoice Disputes, Orders). By default, these are “No” for users.
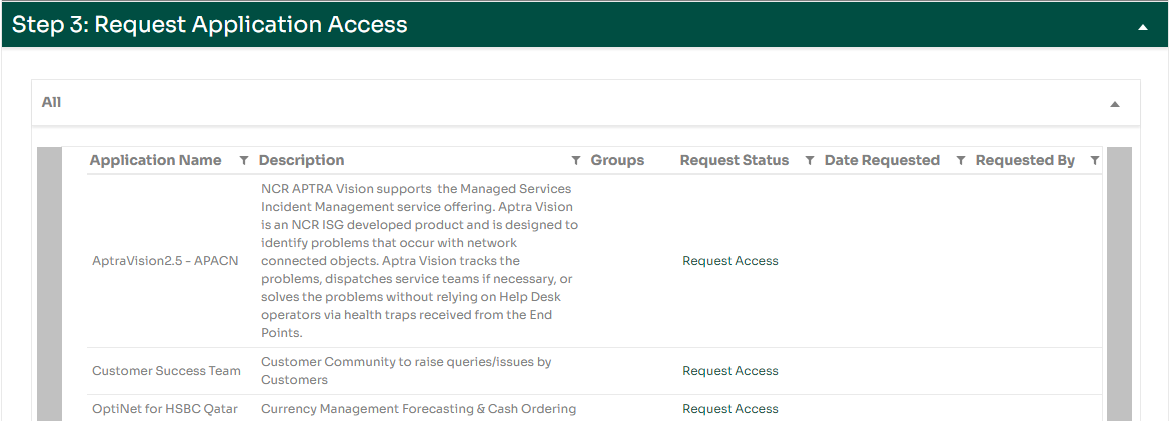
Optionally, request application access for relevant apps tied to the linked MCN(s).
Once complete, click Save.
The new user will receive an automated email with credentials and a 72-hour temporary password.
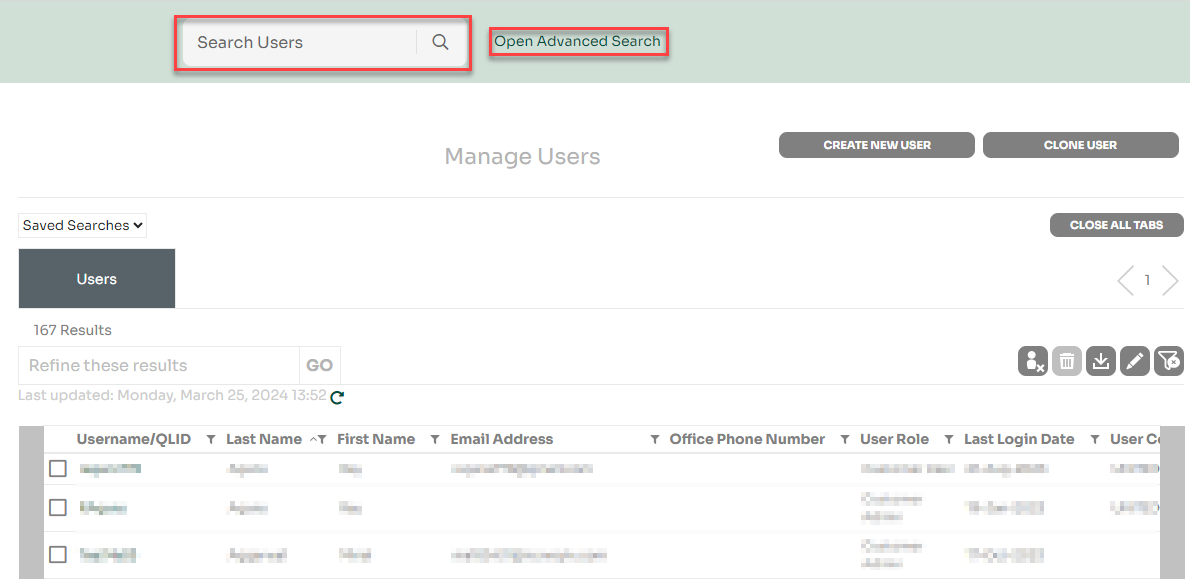
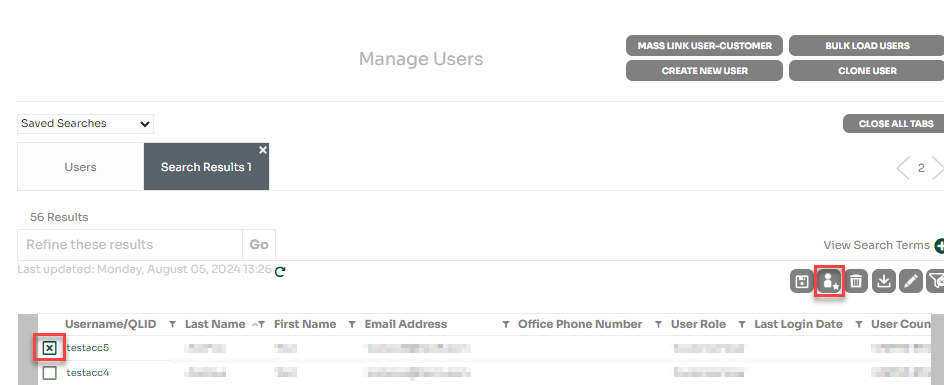
Click a username to view and edit user details, permissions, or linked customers.
Search for a user to clone, check the box next to their name, and click Clone User.

Edit the fields in the clone popup and click Continue.
Finalize details and click Save.
Admins can enable or disable users manually. Accounts also auto-disable if:
Select a user and click the Enable/Disable button, or open their profile to do so directly.
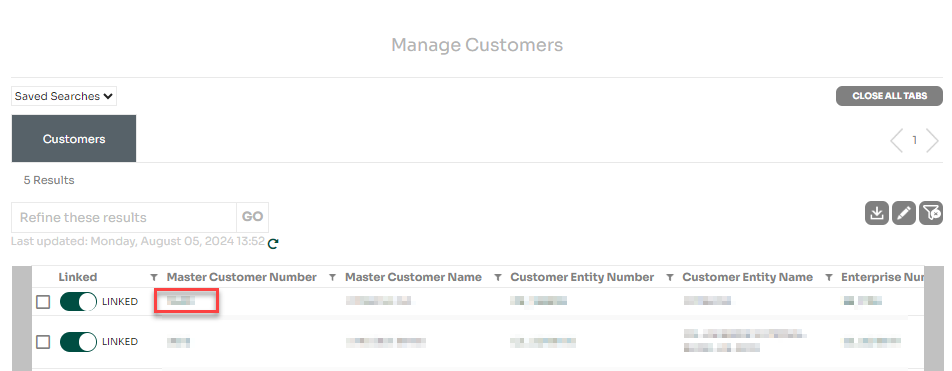
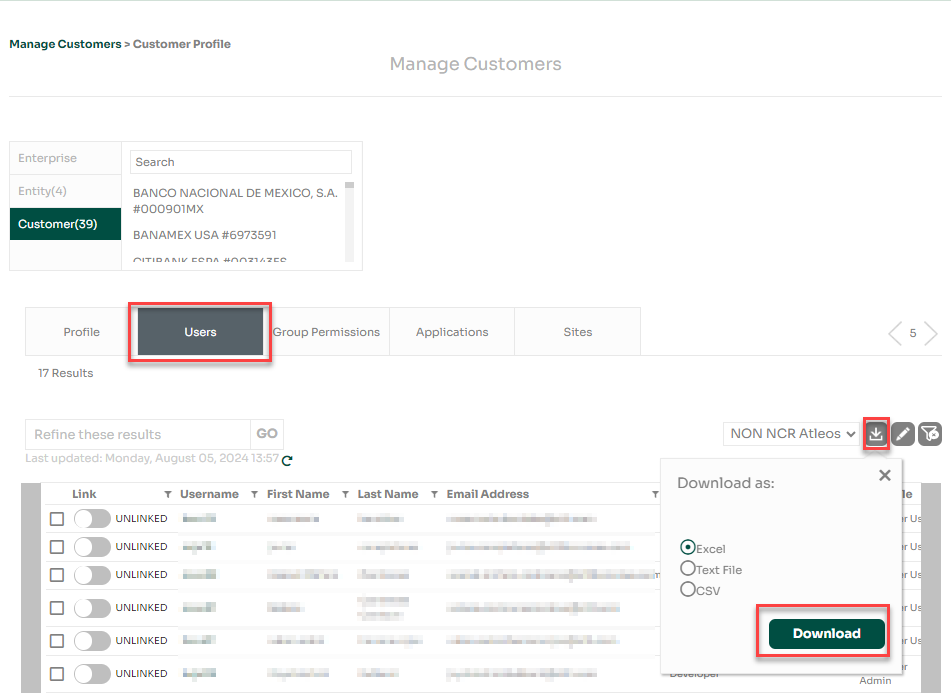
Search for a customer on the Manage Customers page and click the linked MCN to open its profile.
Under the Users tab, click Download and select your preferred file type.
This section is specifically for NCR Atleos employees who need to link themselves within the MyNCR platform. Internal users follow a slightly different process from customers.
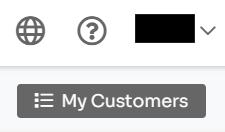
Internal users can manage their own customer linkages through the My Customers button located in the top-right section of the MyNCR homepage.
When the My Customers window opens, first use the search bar at the top to locate the specific Master Customer Number (MCN) you need.
After finding it, expand the MCN by clicking the arrow on its right, then toggle it to LINKED to connect yourself.

Once linked, the associated customer information and applications will automatically appear under your Customers and Applications tabs.