NCR Atleos’s Channel Partner portal gives you immediate access to account information and the ability to transact digitally with NCR Atleos. This is where you will find all Channel Partner training documents, certifications, and applications.
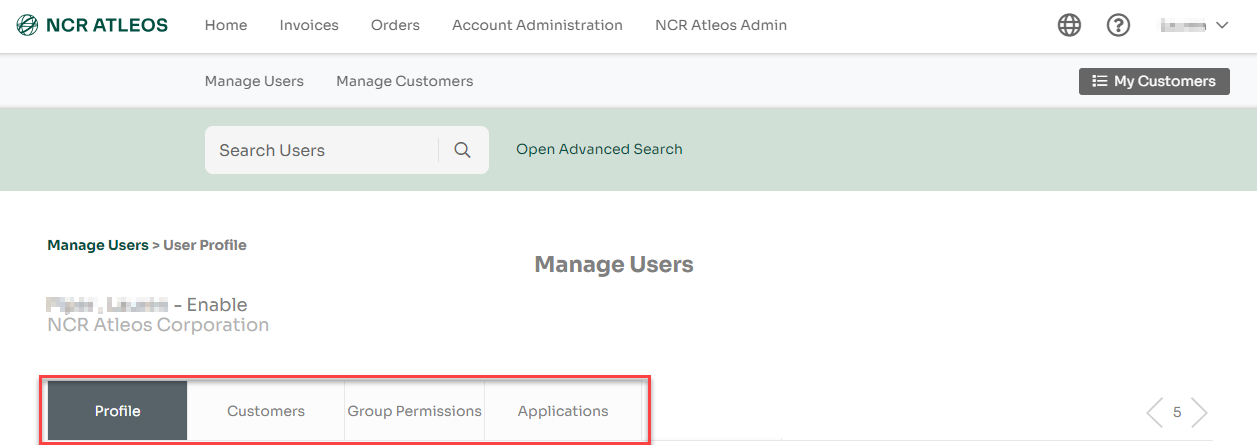
Access your profile page by clicking on your name in the top right of the page.

Within your profile page, you will see the following tabs for the sections you can view and manage:
Profile, Customers, Group Permissions, and Applications.
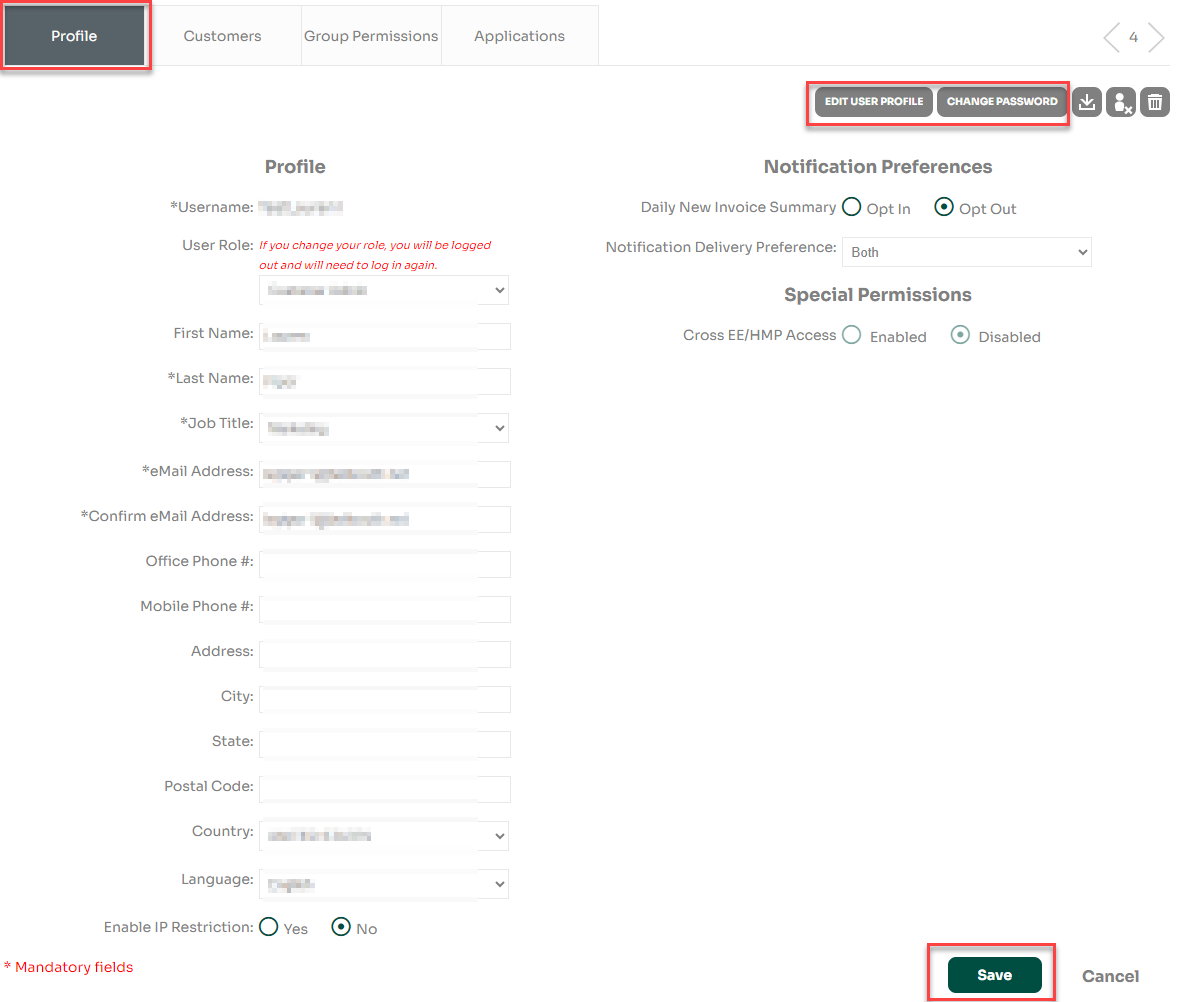
Profile Tab
In the Profile tab, you can edit profile details by clicking on the “Edit User Profile” button, making the changes, then clicking “Save”. You can also click on “Change Password” to change your password at any time.
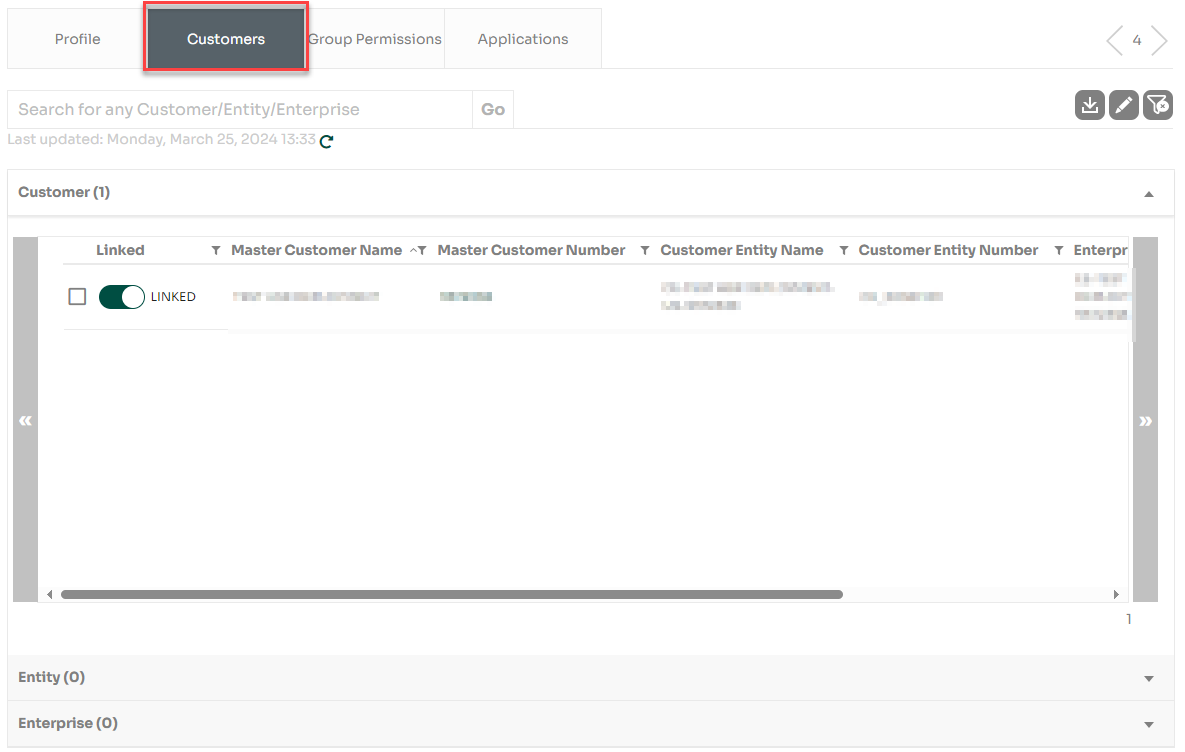
Customers Tab
In the Customers tab you will see a list of NCR Atleos Master Customer Numbers to which you are linked and have access.
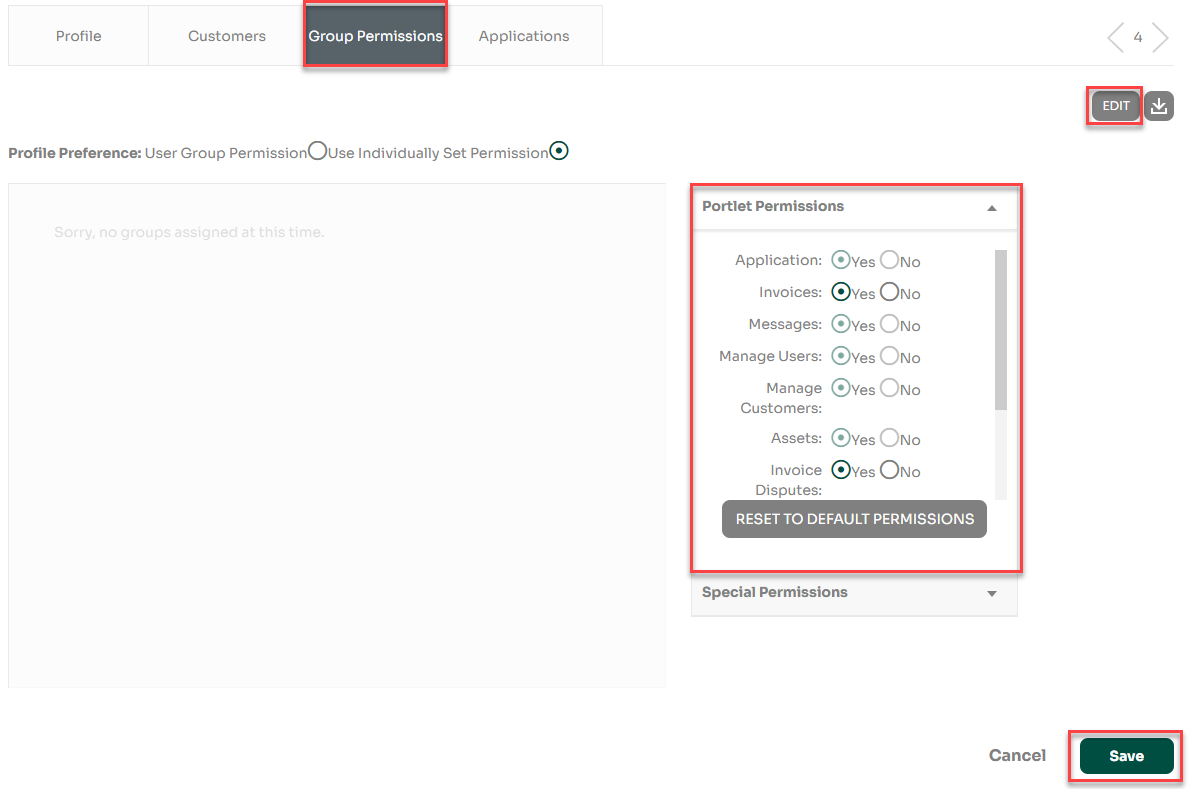
Group Permissions Tab In the Group Permissions tab you can turn off your access to certain portlets by clicking the Edit button, changing the radio buttons, then clicking Save.
Applications Tab
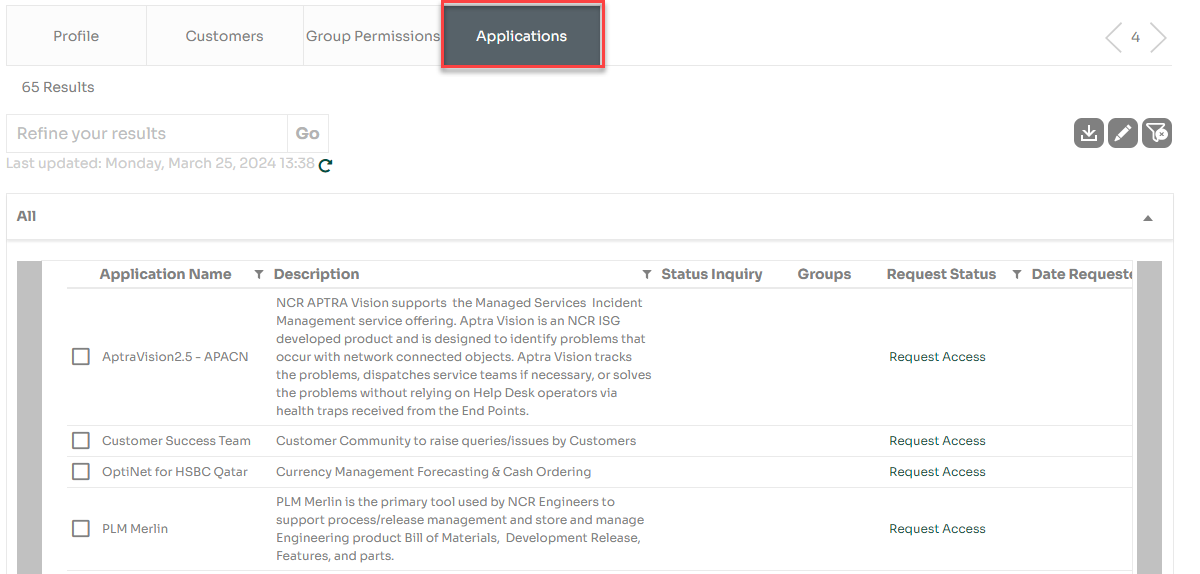
The Applications tab will show a list of applications that are Available for use as well as any others that are available to Add or Request based on your Master Customer Number linkages. Applications with "Request Access" require NCR Atleos approval while applications with "Add App" can be accessed as soon as the app is added to the user's profile.
The main Channel Partner Applications are Partner Network Resource Center, NCR Atleos Product and Services Certification (NCRU), and NCR Atleos Product and Services User Guides (Seismic).
The portal Partner Administrator is responsible for creating new users, managing permissions, and disabling/enabling customer user accounts for their company.
CREATING A NEW USER
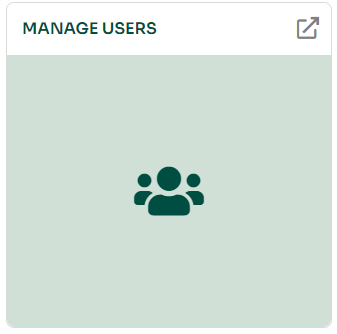
From the portal homepage, access the Manage Users page by clicking on the “Expand” button, or by clicking anywhere within the mint portlet.
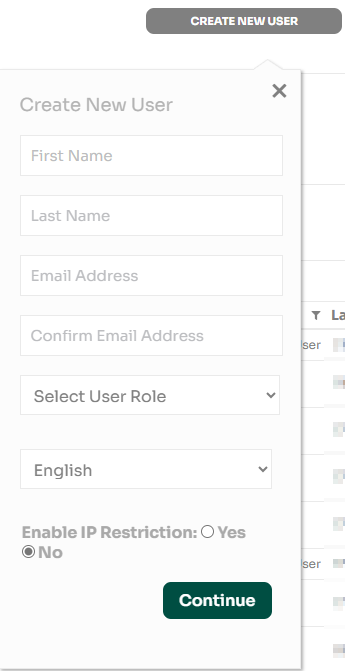
From the Manage Users page, click on the Create New User button.

Complete the pop-up form for the new user ensuring that the email address is not being used for another account within the portal, and then click Continue.
NOTE: During this process, under “Select User Role”, you will choose whether the new user will be a Customer Admin or Customer User. If you select “Admin”, the new user will have full access to all portal's features, and the ability to manage other users. Use this access carefully and only grant this to people in your organization that will managing this site for you or with you. If you select “User” you will grant the new user’s permissions later, and they will not be able to manage other users.
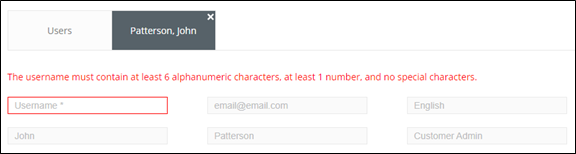
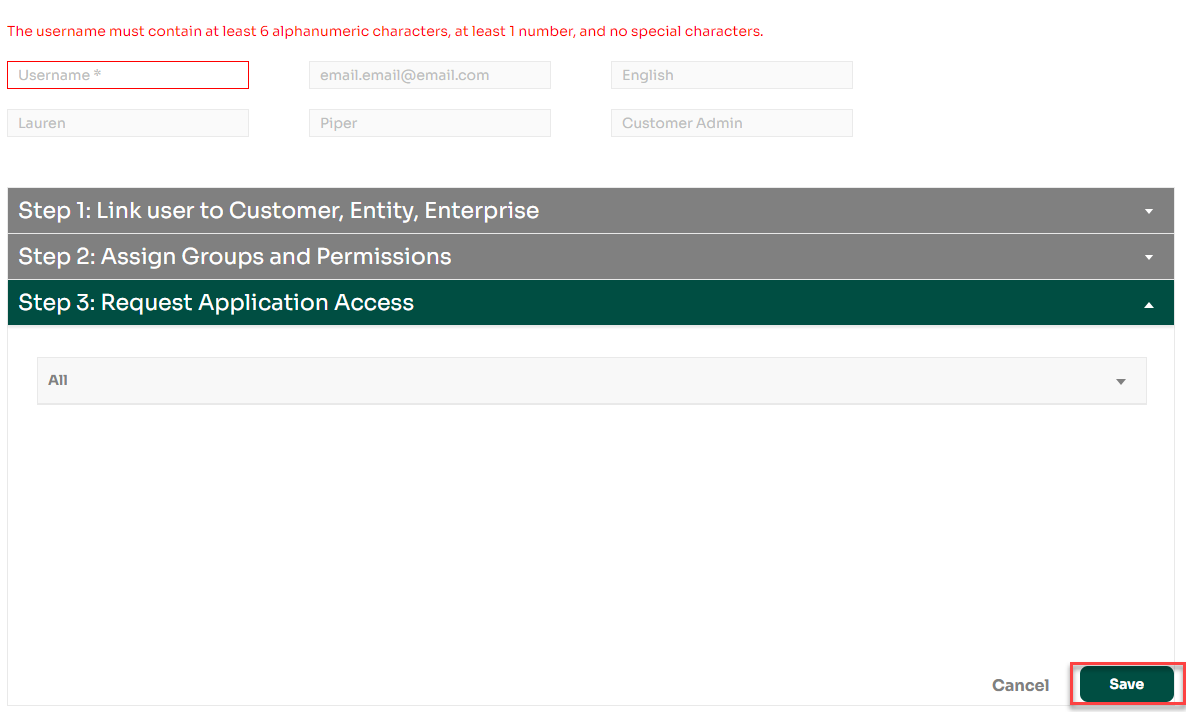
On the next page, you will complete the new user creation process. First, assign the new user a username. Usernames must contain at least 6 alphanumeric characters, at least 1 number, and no special characters.
NOTE: The username cannot be changed later
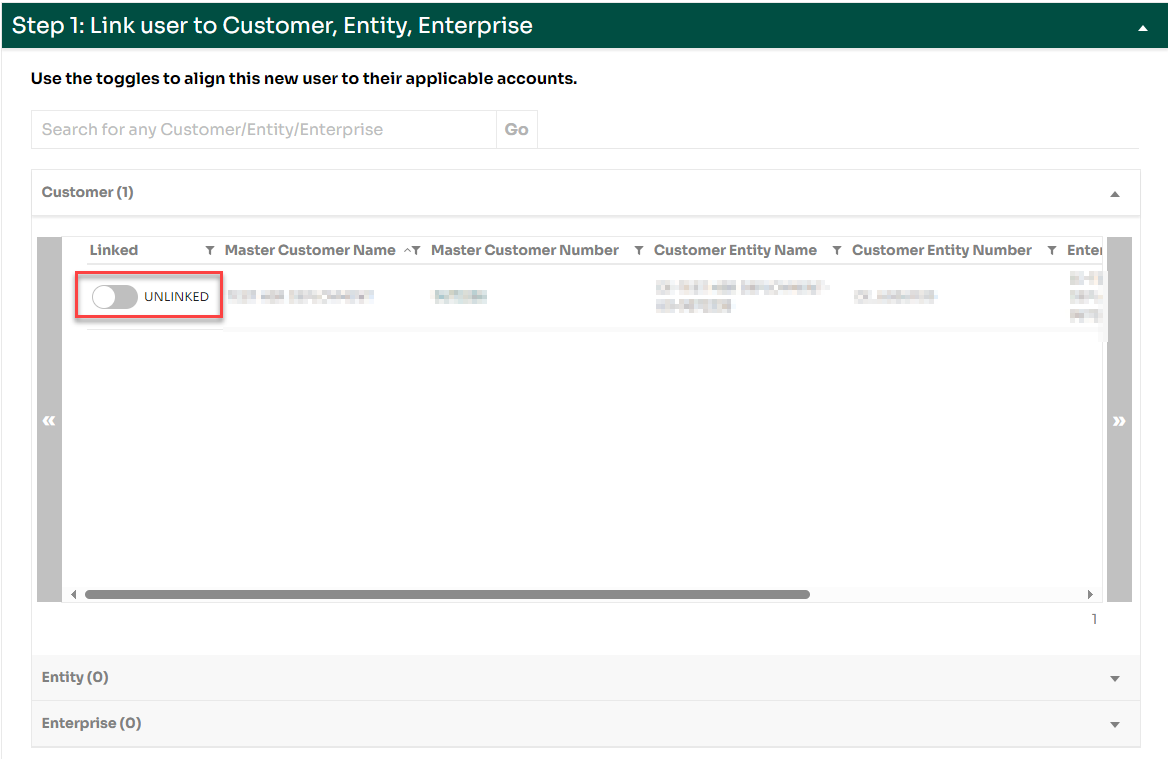
Next, you will link the user to the NCR Atleos accounts to which they require access. The user can be linked at three levels: Customer, Entity or Enterprise.
NOTE: Each organization may have a different amount of NCR Atleos Master Customer or Entity Numbers depending upon the organizational structure.
To link the user at the Customer level, click the “UNLINKED” toggles to change them to “LINKED” toggles for each NCR Atleos Master Customer number to which the user needs access
To link the user at the Entity level, click on the “Entity” section then click the UNLINKED toggle to change them to LINKED toggle for each Entity to which the user needs access. This will give the user access to all the NCR Master Customer Numbers which are associated with that Entity
To link the user at the Enterprise level, click on the “Enterprise” section, then click on the UNLINKED toggle to change it to a LINKED toggle. This will give the user access to all the NCR Atleos Master Customer Numbers for your organization.
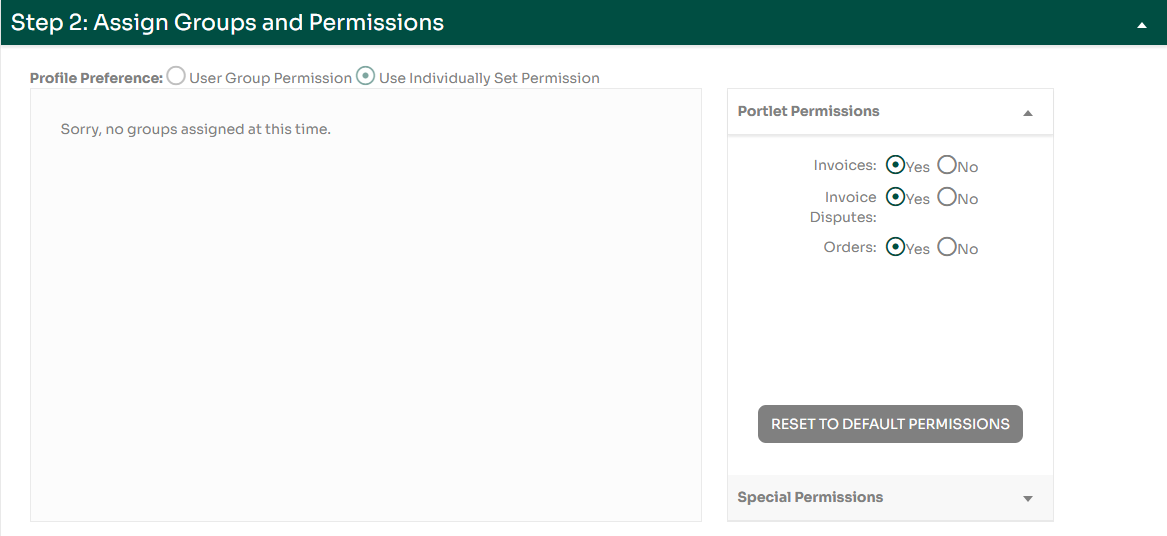
Next, under “Assign Groups and Permissions” you will grant permissions to your new user. You can grant permission to Invoices, Invoice Disputes or Orders, all of which are set at “no” by default for Customer Users. Anything you change to “yes” will allow the user to have full access to the functionality of that portlet.
NOTE: If you are creating a New User that you labeled as Customer Admin, these portlet permissions will be set to “yes” by default. You can set them to “no”, but Customer Admin users can turn permissions back to “yes” within their own profile.
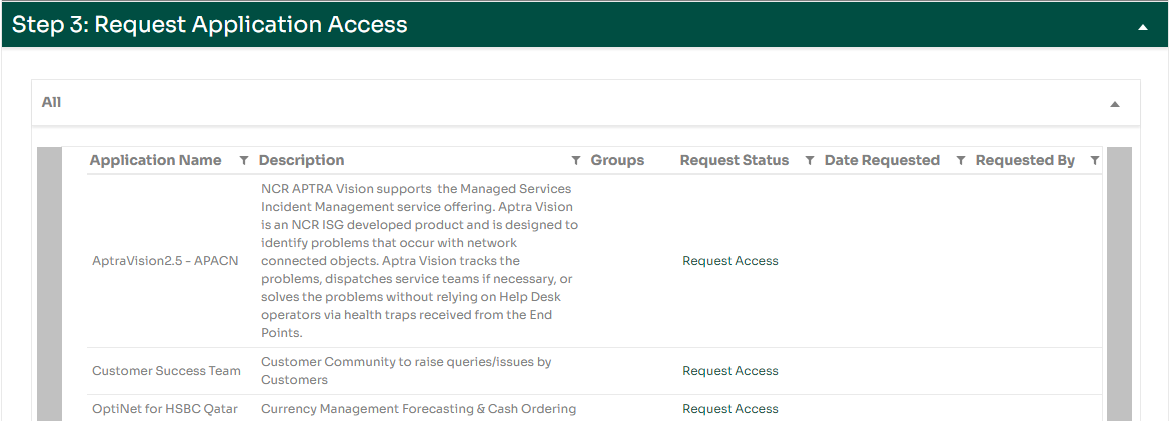
Next, under “Request Application Access”, you can decide if which applications to request for this new user. Applications are downstream systems that partners will access through the portal for things like training, deal registration, etc. Any application that is assigned to the Master Customer Number to which the user is linked will populate for you to request access.
Note: Upon user creation, all Partner Admins are automatically requested Partner Network Resource Center (PNRC), NCR Product and Services Certification (NCRU), and NCR Product and Services User Guides (Seismic). Partner Users are automatically requested NCR Product and Services Certification (NCRU) and NCR Product and Services User Guides (Seismic).
After you have completed all the information for the new user, click the Save button.
Once you have completed these steps, a success message will pop up notifying you that the new user has been created. The user will then receive an automated email with their login credentials, which includes their username and a temporary password.
NOTE: The temporary password is valid for 72 hours, and the user will be disabled if they do not activate their account within the 72-hour window. You can always send a new temporary password within the user’s profile page to re-enable the user.
Click the Hyperlinked Username to on the Manage Users page to Access User Profile. This will take you to the user’s profile where you can:
CLONING A USER
If you have a user with a role and permissions you would like to replicate, you can clone the user as a quick way to create a new user.
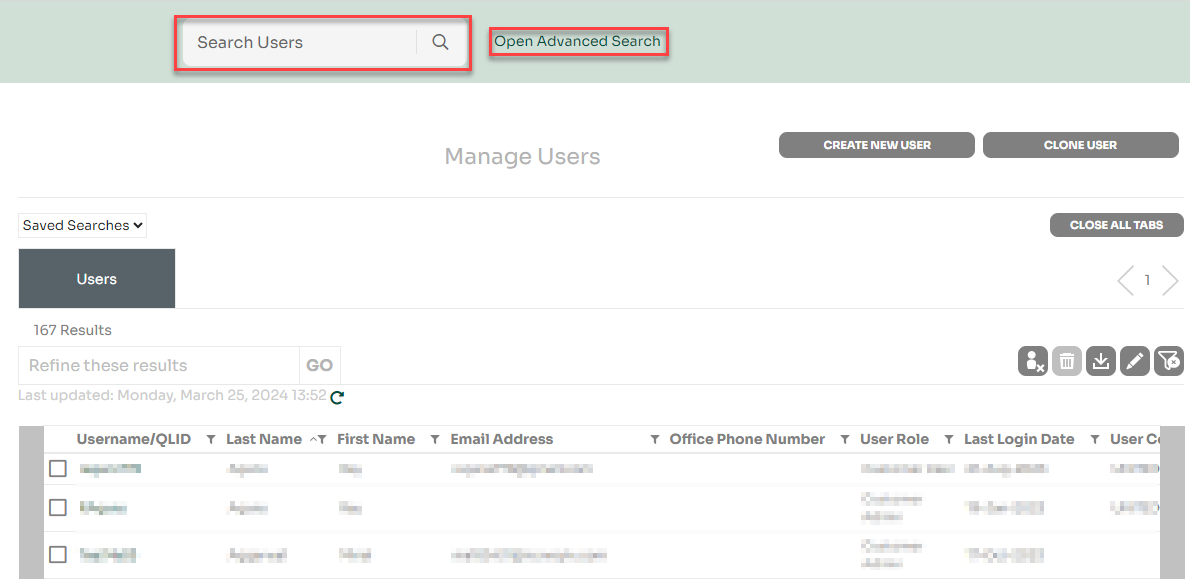
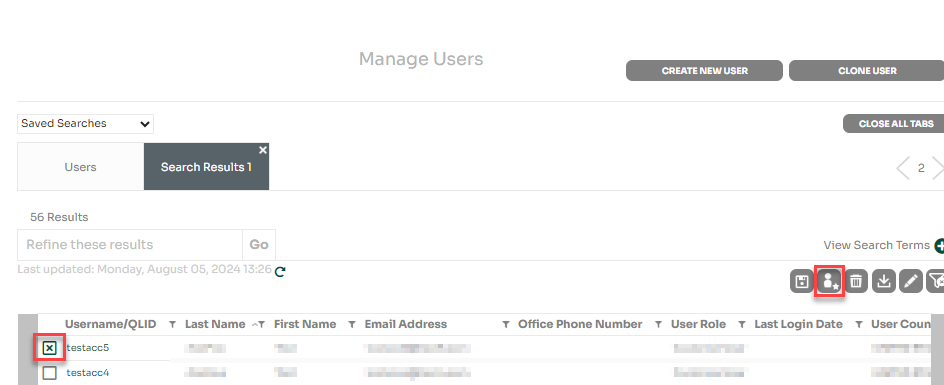
Search for the user you would like to clone on the Manage Users page using the regular or advanced search options.

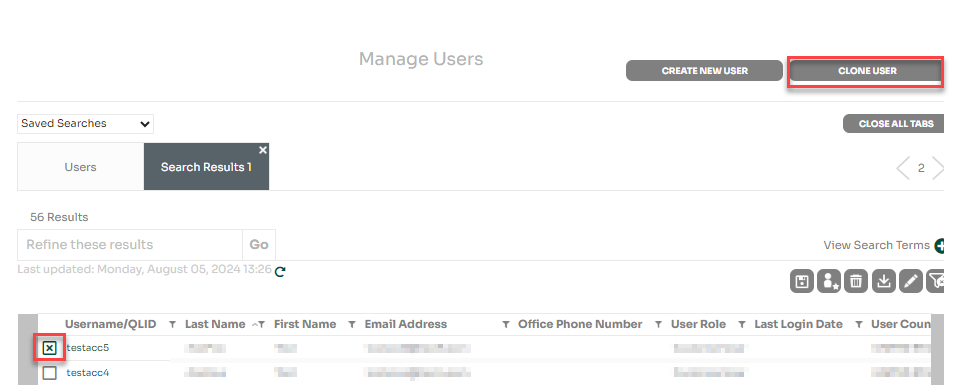
Check the box next to the hyperlinked username and click the Clone User button.
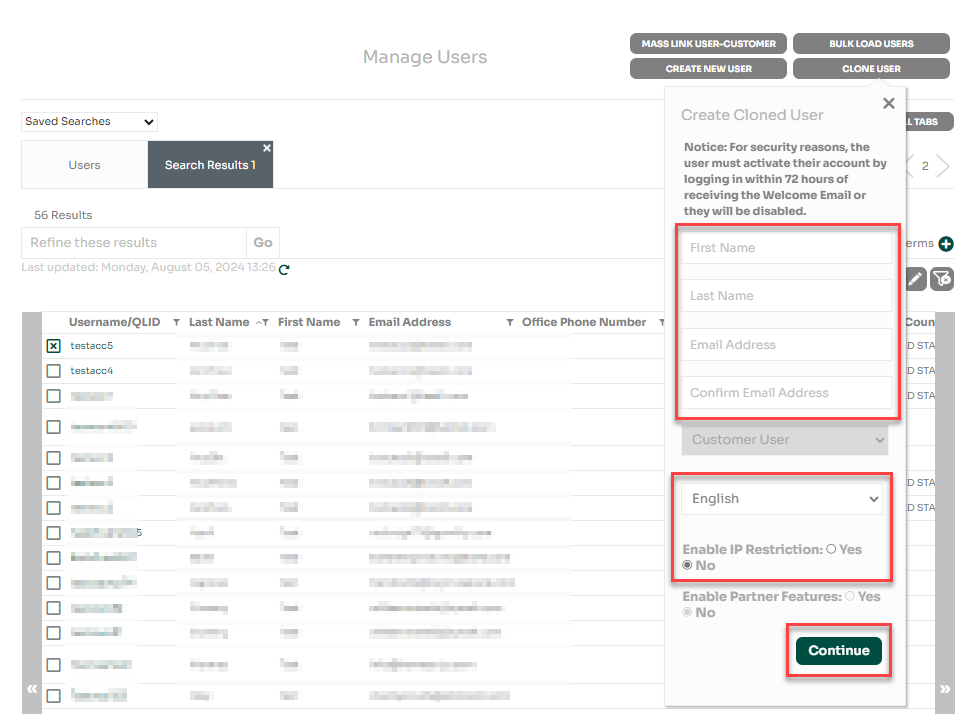
Complete the editable fields of the clone user pop up and click Continue.
NOTE: Since you are cloning a user, some user attributes cannot be changed: User Role, MCN Linkage, Partner Status. If you need to change an un-editable field, then use the Create New User button.
Complete the editable fields on the second Clone User page and Click Save.
ENABLING/DISABLING USERS
Customer Admins are responsible for user management in the portal which includes enabling/disabling users. In addition to Customer Admins manually enabling/disabling users, there are a few systematic reasons a user may be disabled which will be noted on the user profile if enacted.
All users must be linked to at least one Master Customer Number to have an active account. If a user has all MCN linkages removed, then they will be disabled. In this scenario, you must link the user to an MCN in order to re-enable them.
Newly created users have a 72-hour window to activate their account after creation before being disabled. After that window, you can re-send the user the Welcome Email from their user profile to enable them again.
The portal also has a security restriction that disables users after 180 days of inactivity. If this happens and a user is disabloed, you can manually enable them from their user profile. See below for instructions on how to manually enable/disable a user.
Search for the user you would like to enable/disable on the Manage Users page using the regular or advanced search options.

Click the box next to the username and click the enable/disable button.
NOTE: You can only enable/disable one user at a time. There is one button that both enables/disables the used based on it's current status.
OR
Click the hyperlinked username to navigate to the user's profile and then click the enable/disable button.
The user will receive an email listing their username, saying that they have been enabled, and prompting them to login.
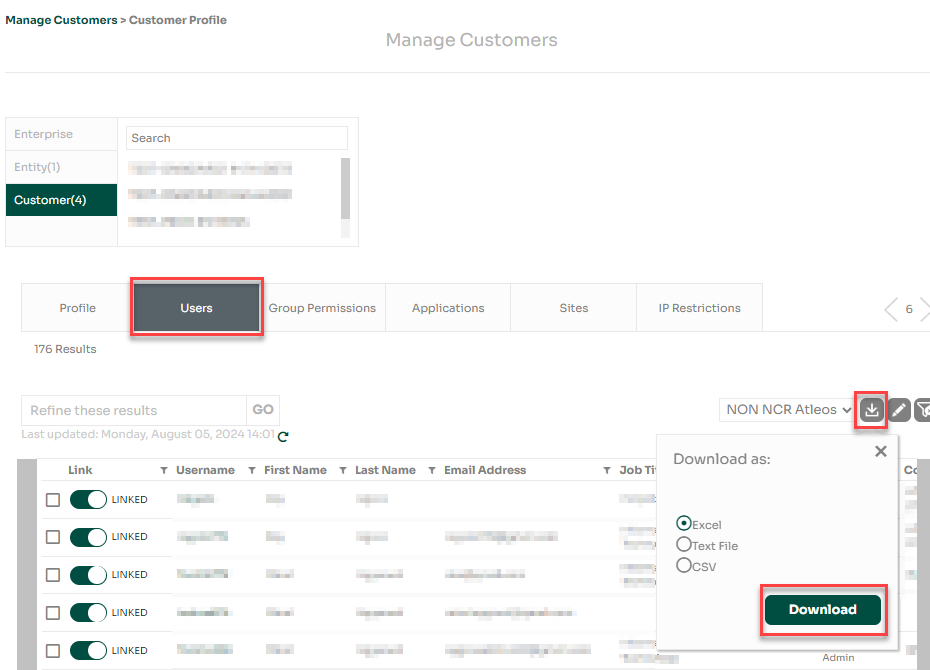
PULLING A USER LIST FOR A CUSTOMER
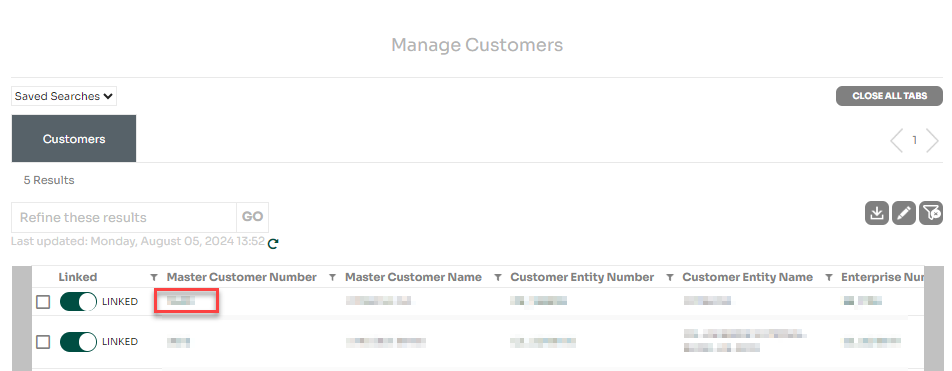
Search for the customer you would like the user list for on the Manage Customer's page using the regular or advanced search options.

Click the hyperlinked Master Customer Number to navigate to the customer's profile.
Click the Users tab to view all users associated to the customer then click the Download button. Select the file type you would like to download then click Download.
NOTE: Users that are linked to the Customer will have LINKED and a teal toggle in the first column of the table and will have LINKED in the first column of the download.